You’ve made it! This is where your preparation pays off. In this section you’ll learn how to register for your courses and make changes, if necessary. Make sure to check the Bridge for your registration dates. The earlier you register, the greater your chances of getting the courses you want.
- Visit www.uleth.ca/bridge
- Log in with your uLethbridge username and password
- If you have not set up a uLethbridge username and password:
- Visit First Time Account Setup
- Enter your 9-digit uLethbridge ID number and birthdate (Example 1)
- Don't have an ID number? Contact the Solutions Centre
- Select a uLethbridge username from a list of predetermined choices
- Set a new password
- Log in with your new uLethbridge username and password
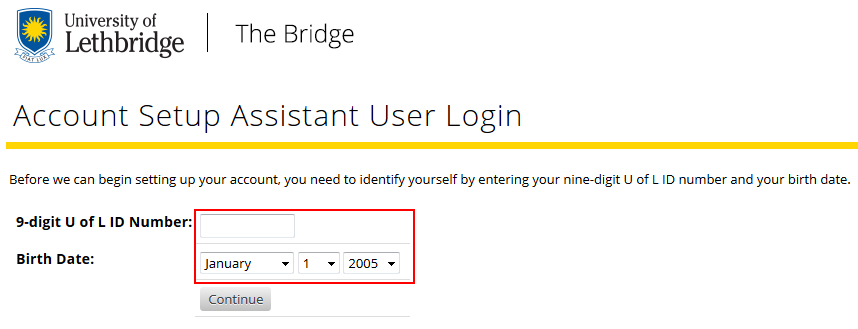
Example 1
- Click the text 'Student' along the top of the screen (Example 2.1)
- Click 'Registration”'
- Click 'Select Term'
- Select the term you want to register for from the drop down menu (Example 2.2)
- Click 'Submit'
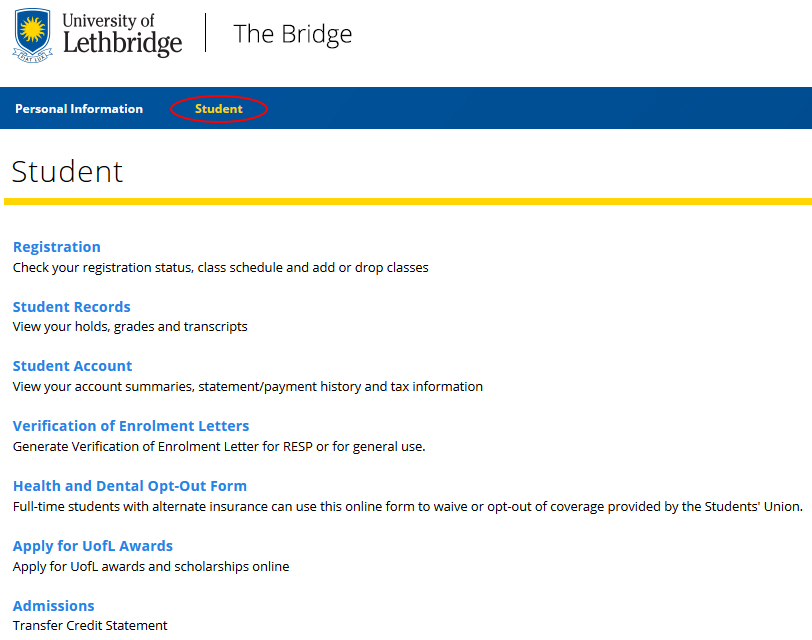
Example 2.1
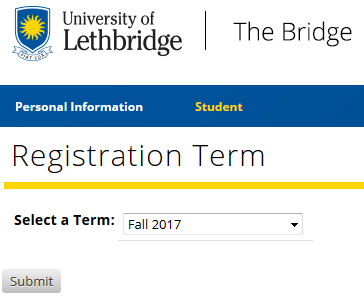
Example 2.2
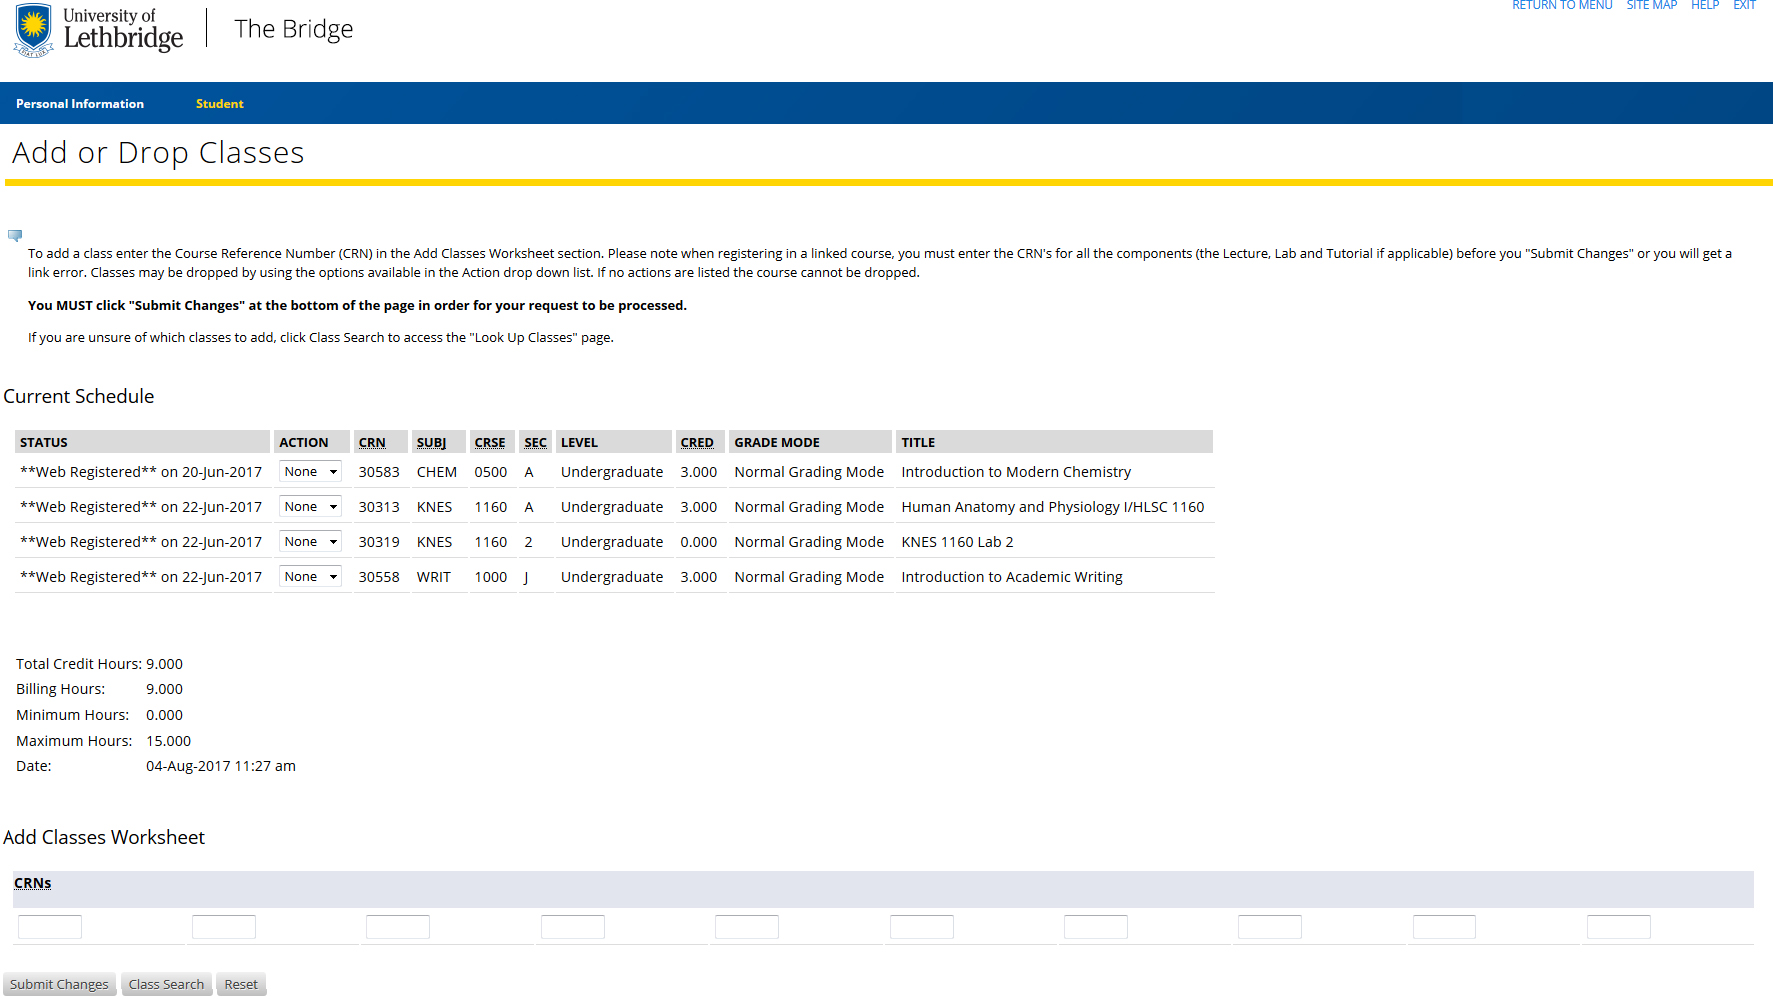
- Click Add or Drop Classes'
- Enter the five-digit CRN (course reference number) in the individual textboxes under 'Add Classes Worksheet' (Example 3.1)
-
If you do not know the CRN number(s) you can skip to Step 4 'Searching for Available Courses' within this tutorial
- It is possible to add multiple courses at once or one course at a time
- When adding a course that requires a lab or tutorial, you must enter the CRN for the lecture section in one textbox and CRN for the lab or tutorial in another textbox
- Click 'Submit Changes' (Example 3.1)
- If successfully registered the course it will appear in your 'Current Schedule' (Example 3.2)
- If there is a problem registering for a course it will appear under 'Registration Add Errors'
Note: If you encounter problems refer to 'Common Registration Error Messages'
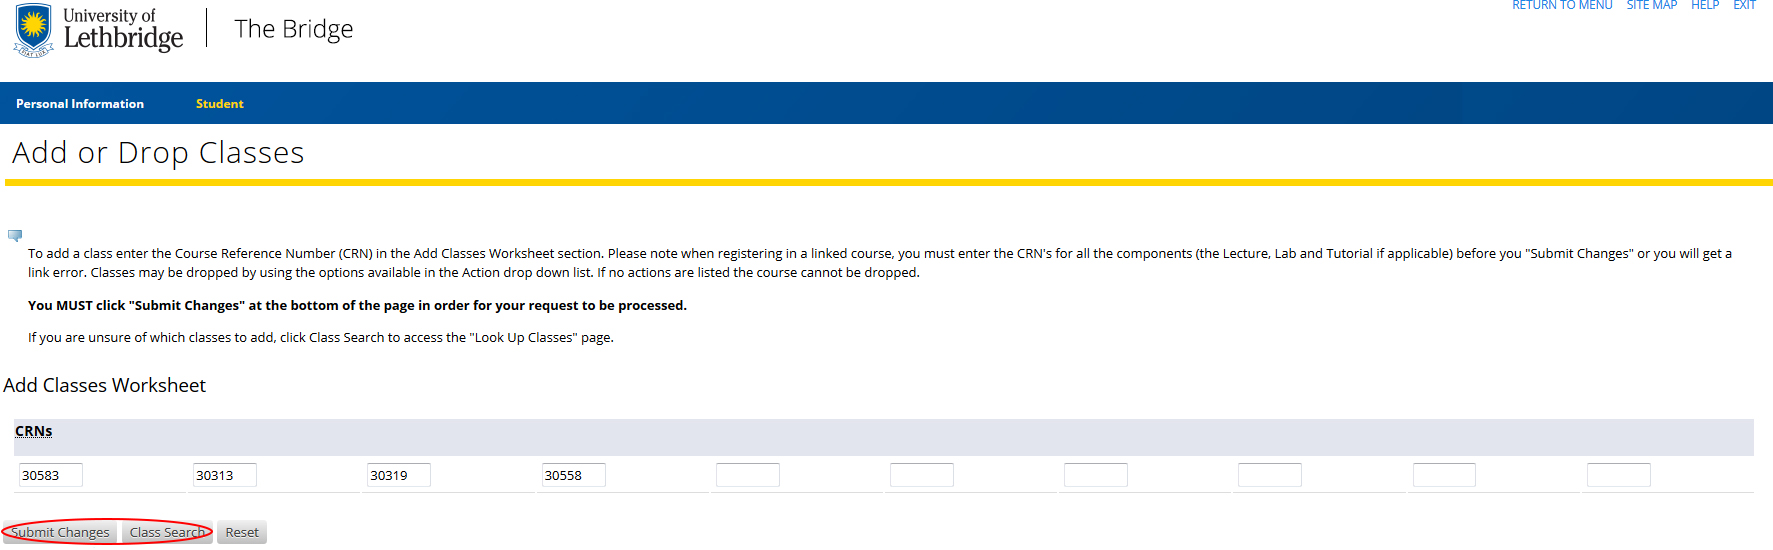
Example 3.1
Example 3.2
-
Click 'Class Search' at the bottom of the 'Add or Drop Classes' window (Example 3.1)
- This search can also be accessed under the 'Registration' menu by clicking on 'Look Up Classes' and then selecting the term in which you are registering
- Select at least one subject from the list.
- Click 'Course Search', then 'View Sections' next to a course to view available offerings
-
You can also click 'Advanced Search' to bring up more filters. Click 'Section Search' (Example 4.1)
- Highlight multiple subjects by using the control key when clicking
- You can narrow your search by entering a course number, start time, end time, campus or days
-
Select one or more checkboxes (Example 4.2)
- Open sections will have an empty checkbox
- When adding a course that has a lab or tutorial, you must select both the lecture section and the lab or tutorial
- Be careful to select the course(s) offered at the uLethbridge campus that you will be attending. For example, Calgary is designated by a 'Y' (Example: 'MGT 3470 Z')
- Click 'Register' to add the class to your schedule (Example 4.2)
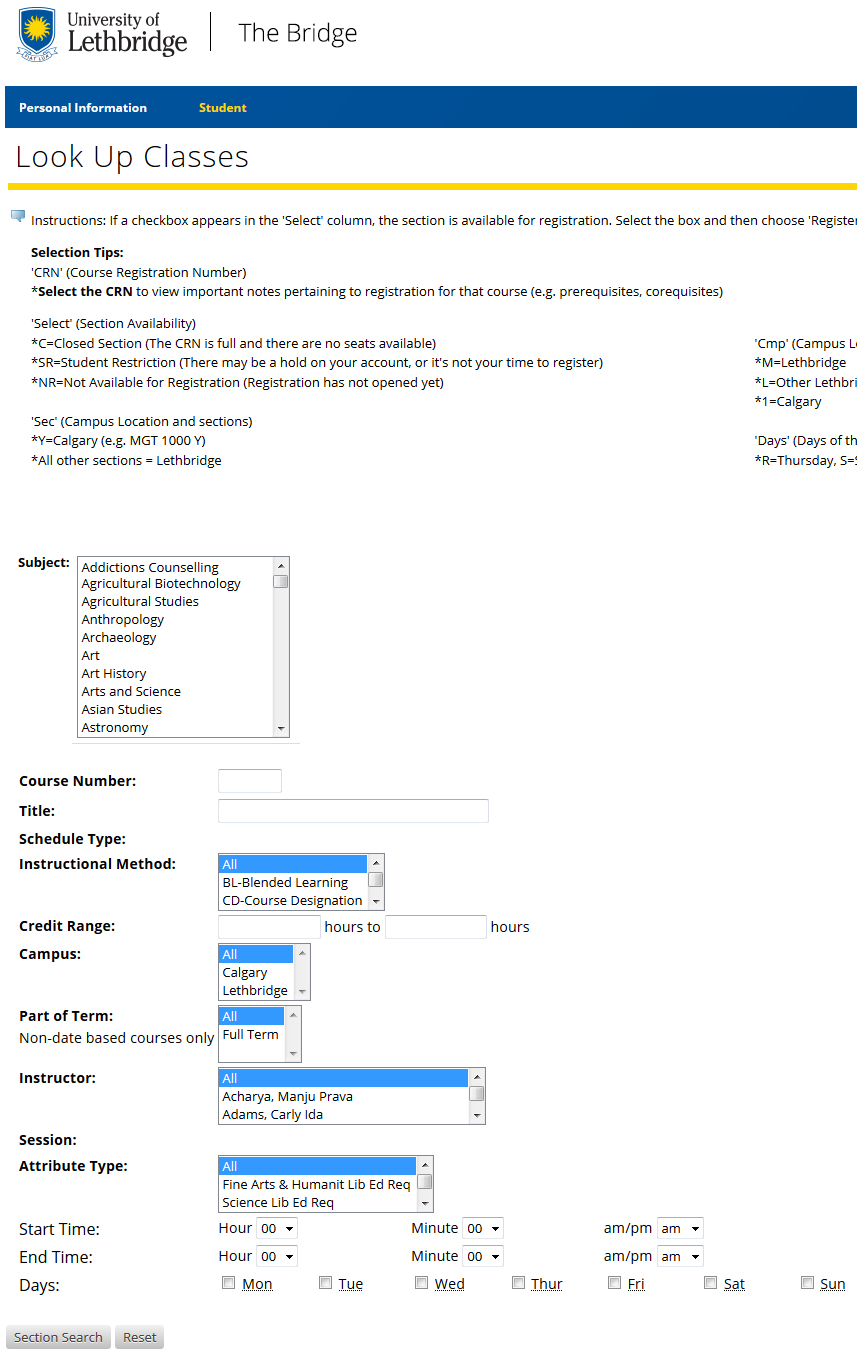
Example 4.1

Example 4.2
- Click the text 'Student' along the top of the screen (Example 2.1)
- Click 'Registration', then click 'Add or Drop Classes'
- Make sure you are in the 'Current Schedule' window (Example 3.2)
- Click the drop down arrow next to the course you wish to remove (Example 5.1)
- Select 'DROP' from the list
- You can drop multiple courses in this window before submitting the change(s)
-
Click 'Submit Changes'
- For drop/deletes to take effect, you MUST click on 'Submit Changes'
- Check your schedule to ensure the changes have been processed (refer to Step 6 'Confirm your Registration' within this tutorial)
- If you wish to change the section, lab or tutorial try adding the new class before dropping the original one (to reduce the risk of losing your seat)
Note: When dropping a course that requires a lab or tutorial, be sure to drop the corresponding lab or tutorial as well.

Example 5.1
- Click the text 'Student' along the top of the screen (Example 2.1)
- Click 'Registration', then click 'Week at a Glance'
- Select the term you are registering for from the drop-down menu
- Click 'Submit'
-
Confirm your schedule looks correct
- Print a copy of your schedule to use as a reference (Example 6.1)
- Various timetable changes can occur after you have registered. Be sure to check your schedule before the first day of classes.
Note: If you decide not to attend the uLethbridge, make sure to drop all courses from your schedule before the Add/Drop deadline, otherwise you will owe tuition and fees

Example 6.1
- Click 'EXIT' on the top right corner of the Bridge (Example 7.1)
- Close your browser by clicking the 'X' in the top right corner of the browser window
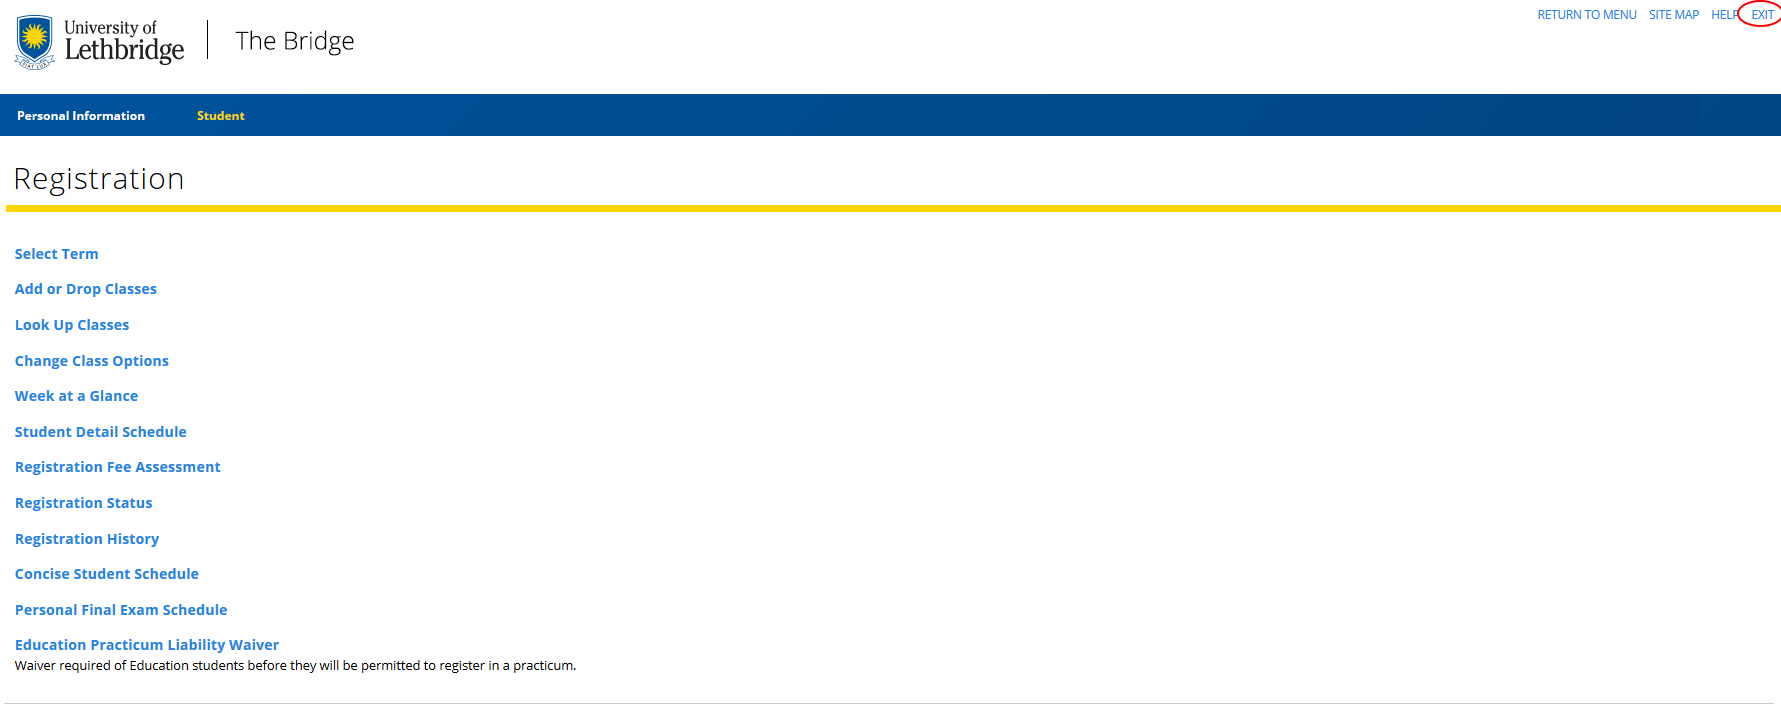
Example 7.1
Was this content helpful? Send us your feedback.